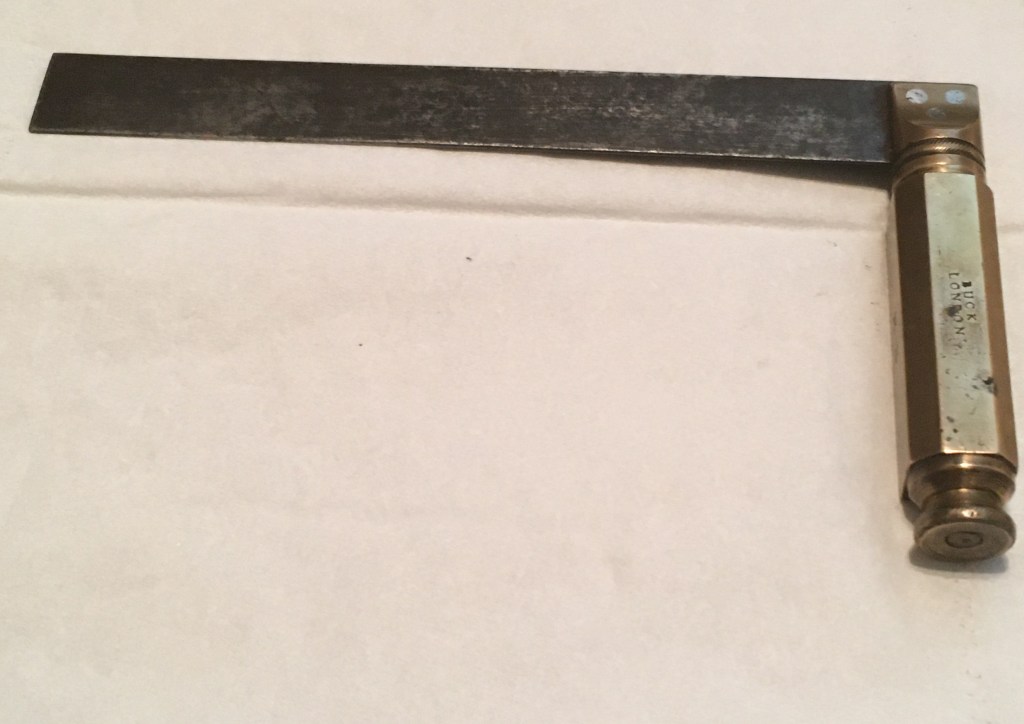
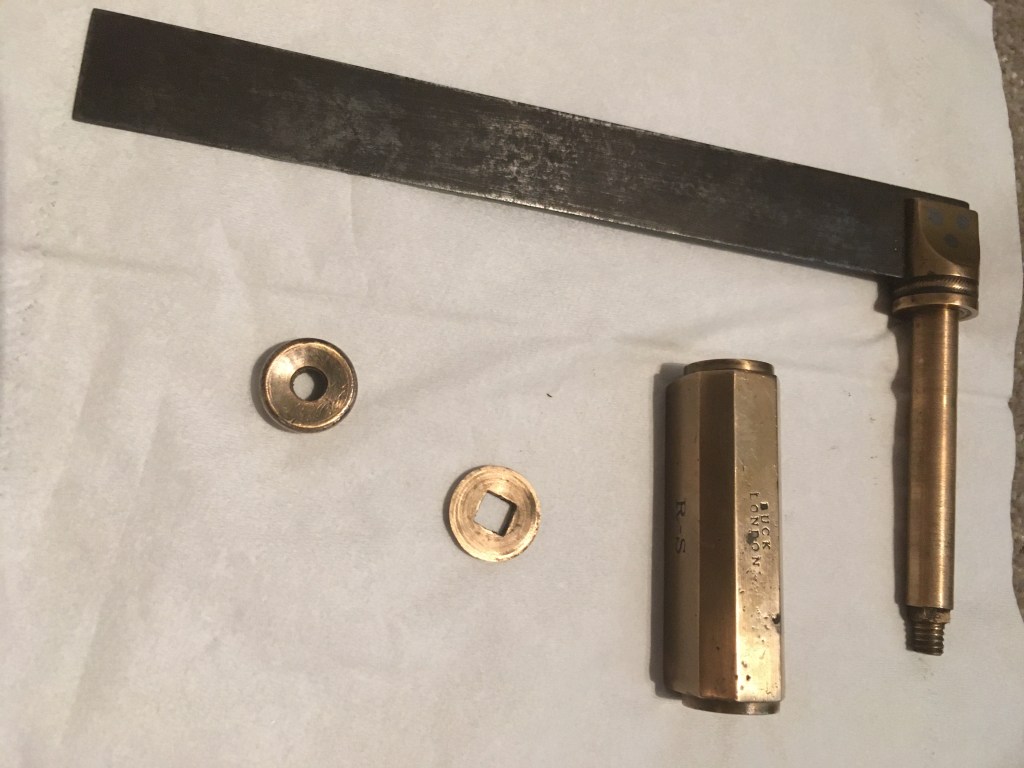
Rare antique set squares by Buck of London are highly prized by collectors of 19th-century trade tools, particularly those associated with specialised crafts like coach making. The “Buck” name refers to a family of renowned London toolmakers, including Joseph Buck (91 Waterloo Road) and George Buck (242 Tottenham Court Road), who famously supplied precision instruments to coach makers, engineers, and piano makers.
Key Makers and Origins
The Buck family established several distinct branches in London, each producing high-quality tools that are now considered rare antiques:
Joseph Buck: Operated from 91 Waterloo Road between 1844 and 1863. Tools from this period are often stamped with this specific address and are noted for their hardwood and brass construction.
George Buck: Located at 242 Tottenham Court Road starting in the late 19th century. This branch specialized in tools for “Pianoforte Makers, Carpenters, [and] Coach Makers”.
Buck & Hickman: A major evolution of the family business, formed when John Roe Hickman partnered with his uncle George Buck in the mid-19th century
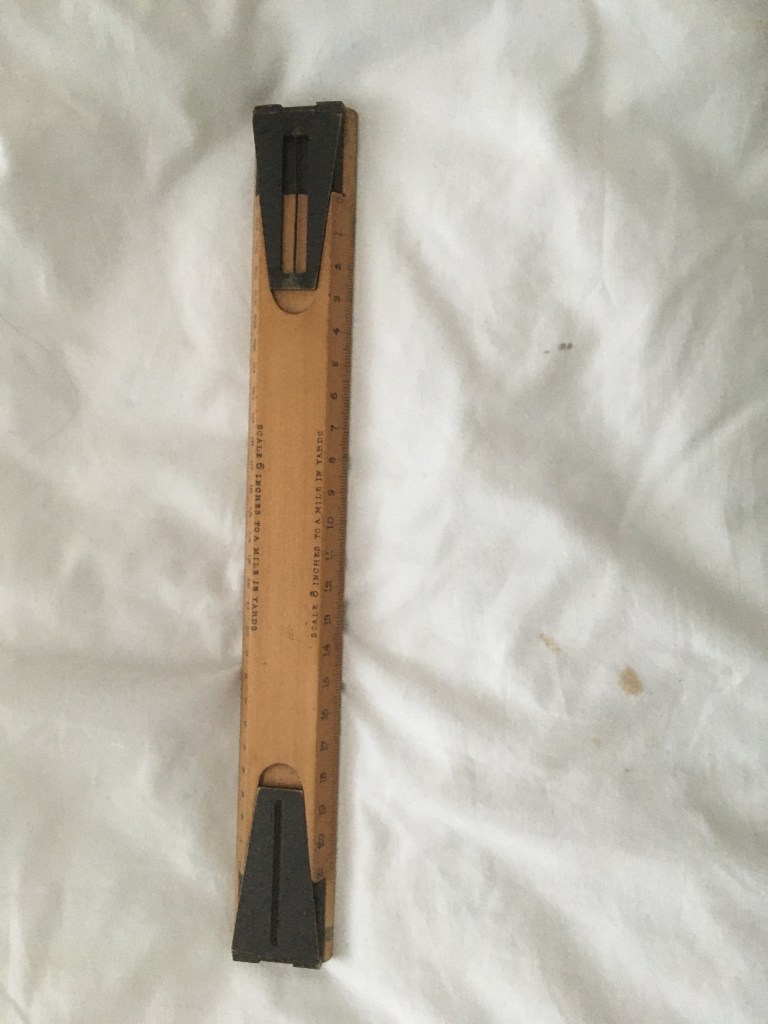
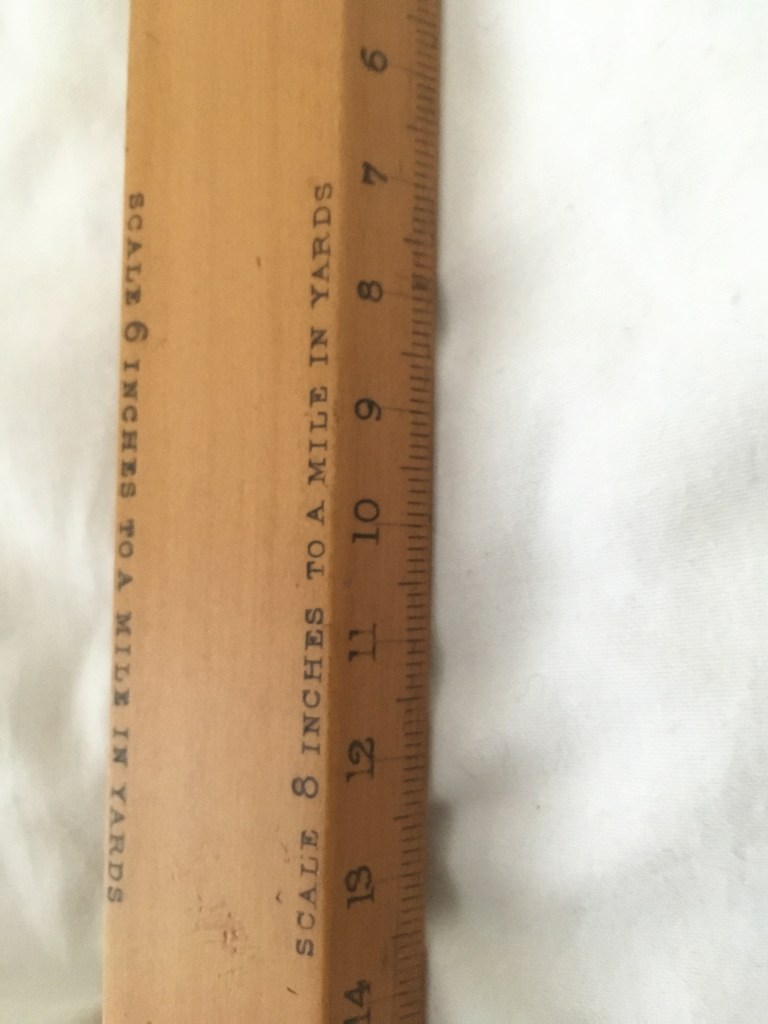
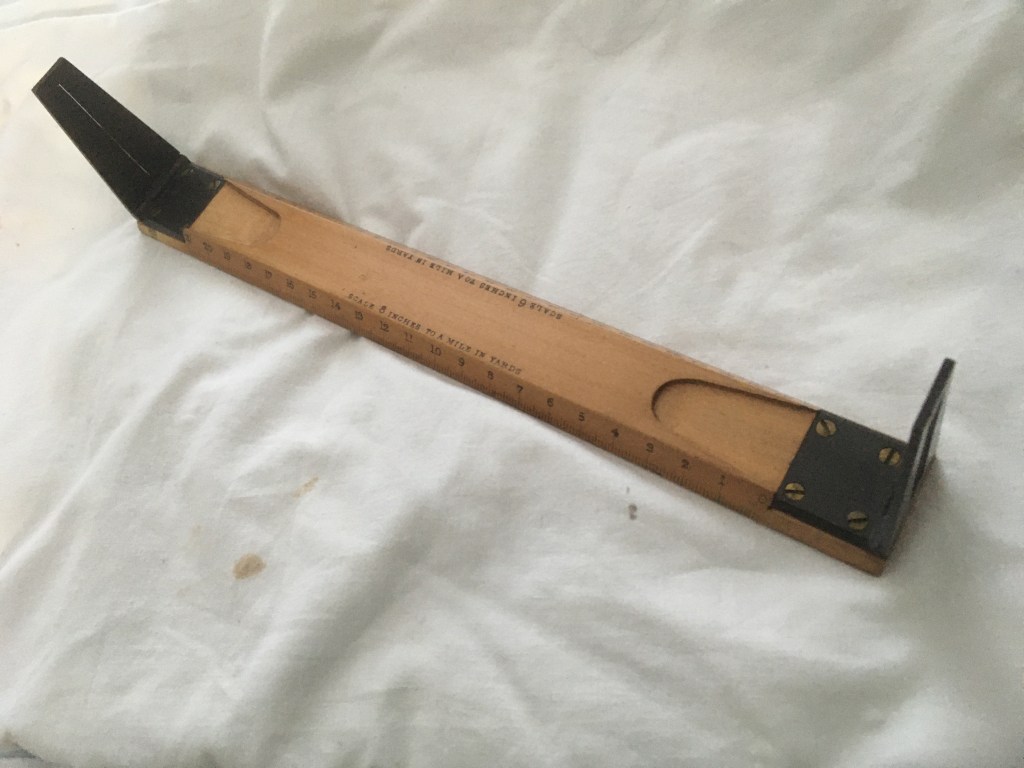
This curious ruler features two scales: one marked “8 inches = 1 mile” and another “6 inches = 1 mile.” It’s equipped with two sighting arms—one with a slit, the other with a slit and a vertical metal hair. If these arms were mounted on a level, it might resemble a sighting level.
Its exact purpose remains a mystery. If anyone has come across a tool like this before or knows what it was used for, I’d love to hear from you.
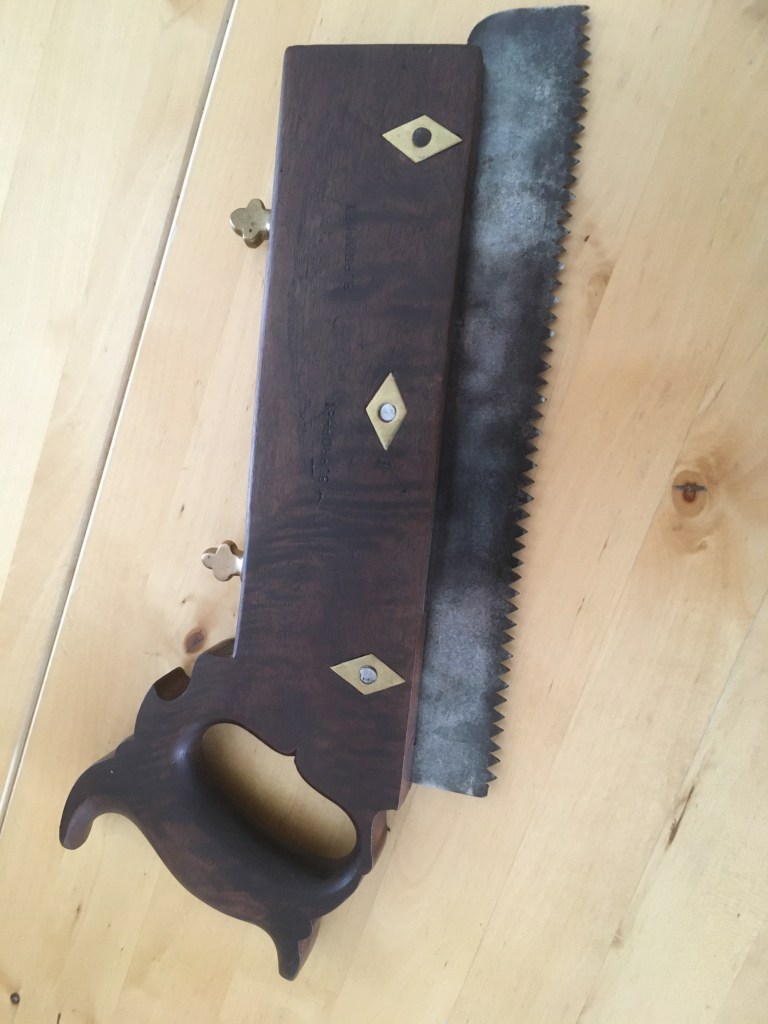
A staircase hand saw is a specialized hand tool with an adjustable depth stop, historically used by woodworkers to cut the grooves (dados) in stair stringers. Today, it is more commonly used for other woodworking tasks, particularly for cutting precise dado and stopped dado joints.
Key features
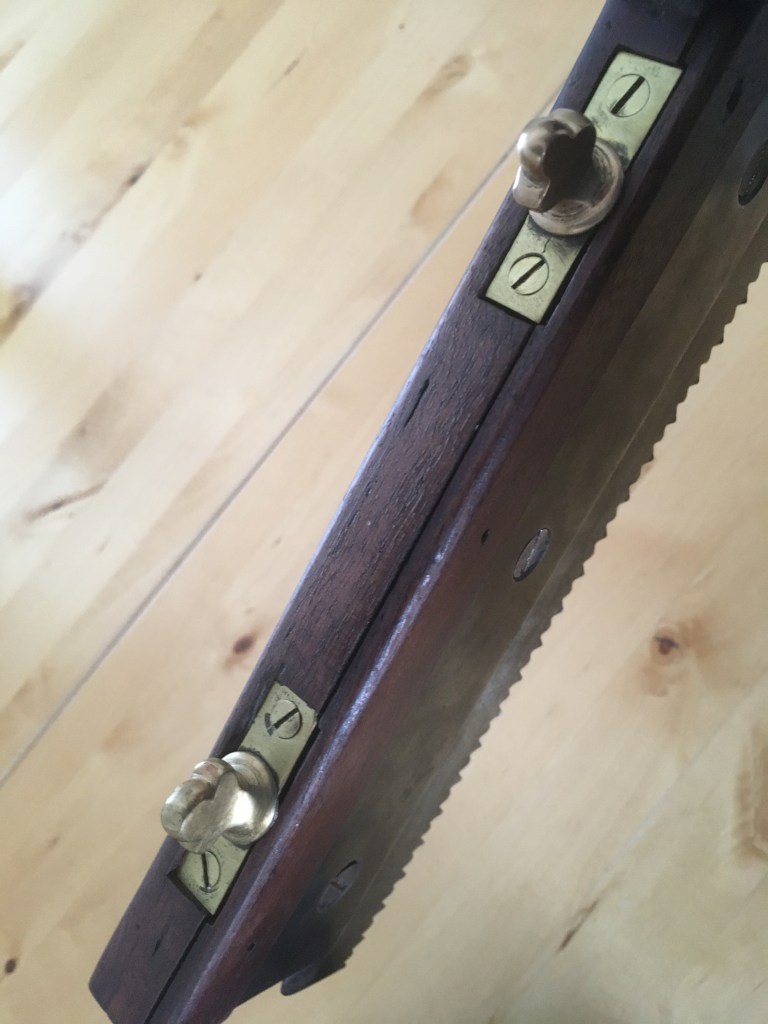
Adjustable depth stop: A defining characteristic of this saw is a removable or adjustable block that limits how deep the blade can cut. This allows for uniform, shallow cuts.
Directional cutting: Unlike most handsaws, the blade on a staircase saw has no rake, allowing it to cut efficiently in either a push or pull motion.
Design variations: While early versions had a simple wooden body, more modern and robust kits may feature brass hardware for the depth adjustment. The handle can be either open or closed.
Versatility: Though originally made for stairs, the tool is useful for any woodworking project requiring accurate, repeated dado joints, such as building bookshelves or casework furniture
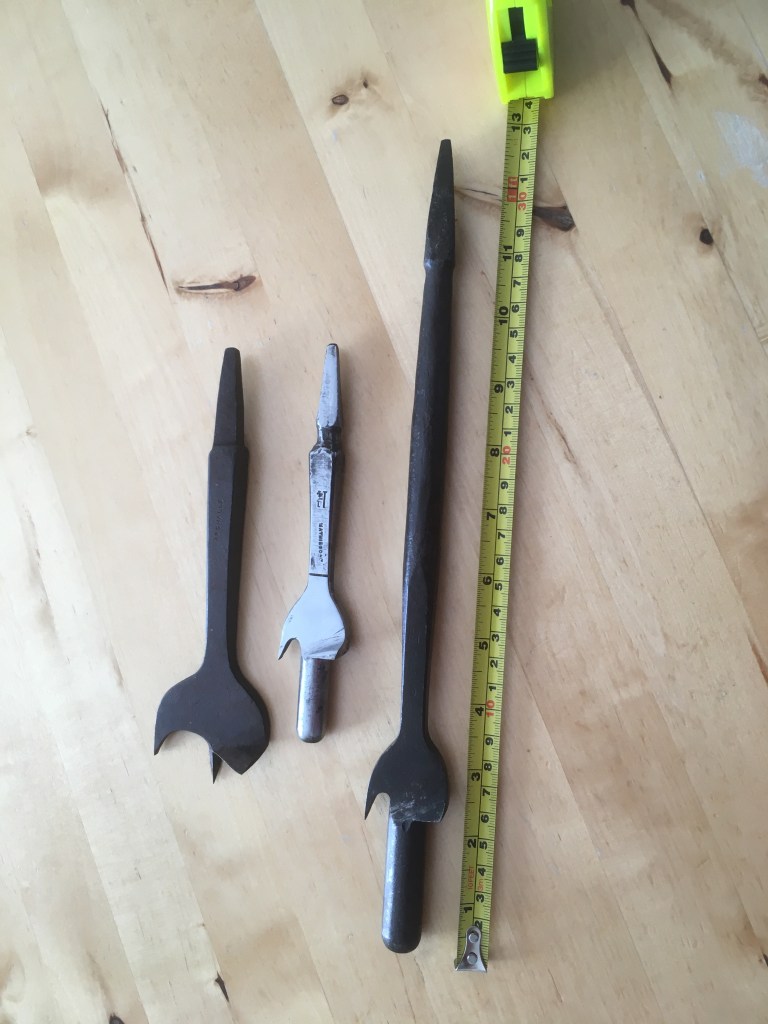
In the past, craftspeople, particularly shipwrights, used specialised bits for creating and plugging holes in decking. These antique tools are now primarily collector’s items.
Shipwright’s dowelling bit: These tools, often marked by makers like Mathieson or David Flather, were also known as plug center bits.
Function: The bit counterbored a hole for a fastener and also cut a precisely fitting dowel (or “bung”) to cover the screw or bolt head. The dowel was then glued in place to create a smooth, flush finish.
Modern plug-cutting methods
Today, the process of plugging screw holes is achieved with modern tools, often in kit form, which provides a clean and finished look for unpainted decks.
Plug cutter: A plug cutter is a drill press attachment that cuts plugs with a slight taper from a piece of scrap decking. This is ideal for matching the wood grain of the plug to the deck board for a nearly invisible repair.
Forstner or spade bit: For a less refined but still effective approach, a Forstner or spade bit can be used to drill the initial hole.
Installation: After drilling the hole and driving the screw, a wooden dowel is glued in, tapped into place, and cut flush with a flush-cut saw.
Removing old dowels
If you need to remove old, rotted, or broken dowel plugs, a few tools can help:
Plug cutter: Drill around the dowel with a plug cutter that has a larger diameter than the original dowel to cleanly remove it.
Drill bit: You can use a drill bit of the same size or slightly smaller to bore into the center of the old dowel. This will weaken the wood and allow you to pry it out.
Extractor or puller: While more for industrial or mechanical dowels, specialised pin pullers and extractors exist for stubborn pins and can be adapted for wood
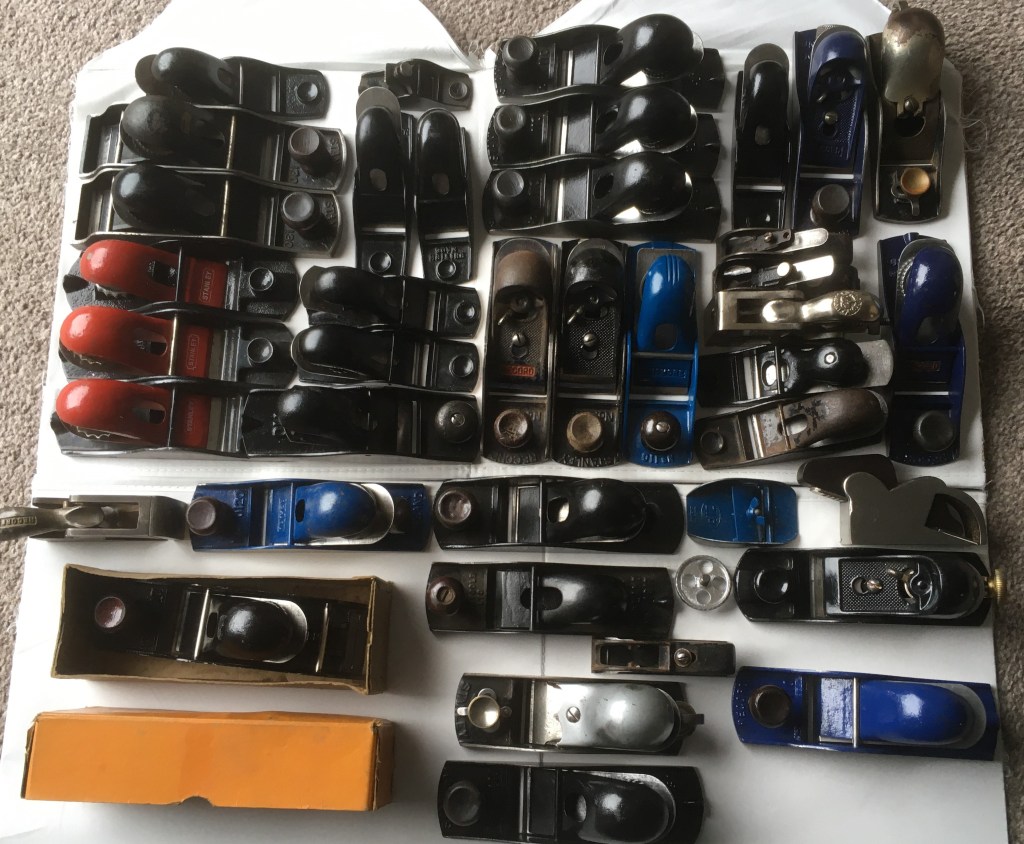
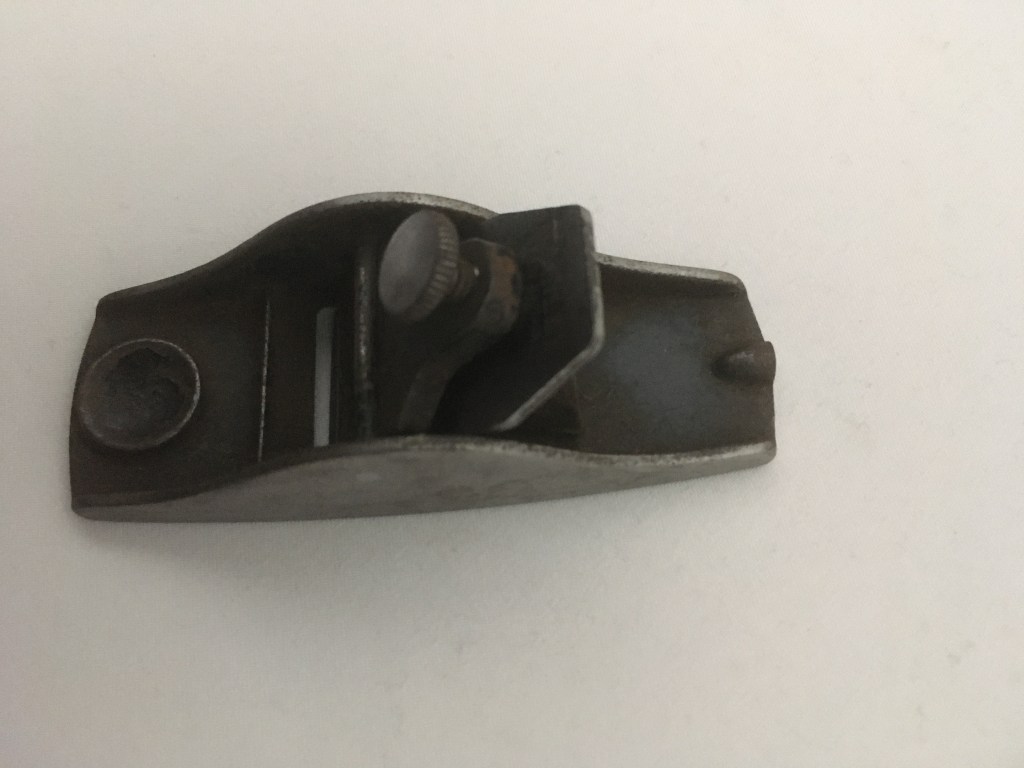
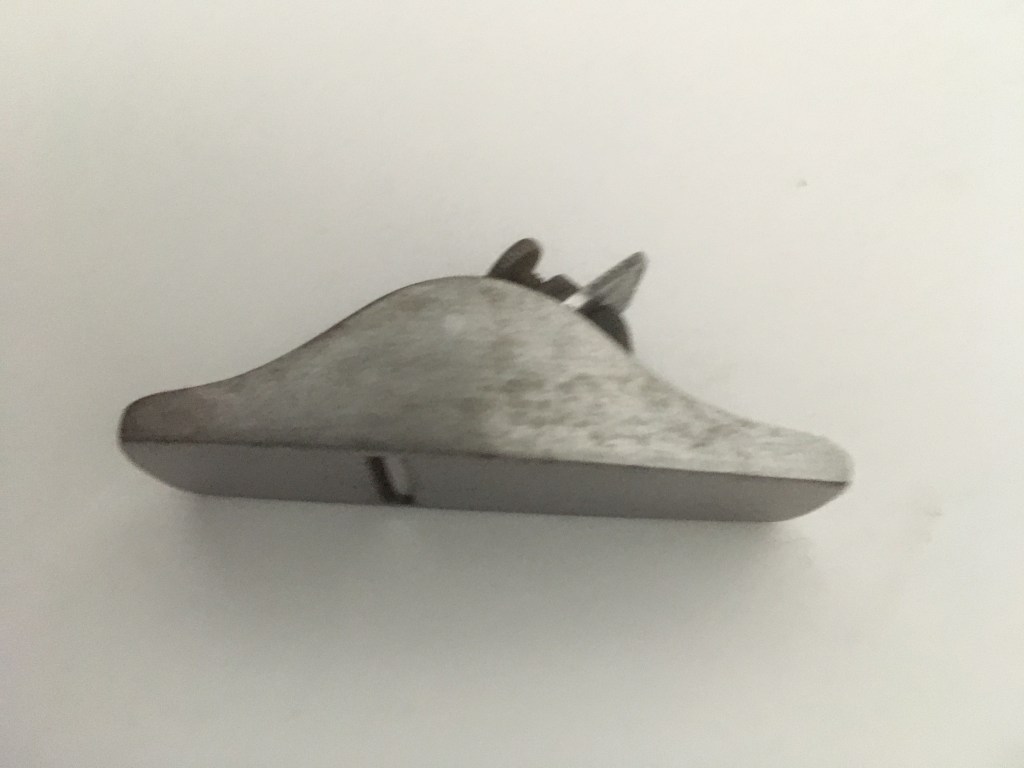
The block plane may not be the crown jewel of a collector’s cabinet, but it deserves far more admiration than it often receives. Compact, versatile, and deceptively powerful, this tool is a quiet workhorse—always ready, always useful.
While collectors may chase after rare infill planes or ornate joinery tools, the block plane remains a steadfast companion in both the workshop and the restoration bench. Its simplicity belies its utility: from chamfering edges to trimming end grain, it excels in tasks that demand finesse and control.
🔧 Why Every Craftsperson Should Own One
Precision in the Palm of Your Hand: Its small size allows for one-handed use, perfect for delicate adjustments and tight spots.
Ideal for End Grain: With a low-angle blade, it slices through end grain cleanly, something larger planes often struggle with.
Quick Touch-Ups: Whether you’re fitting a drawer or easing a sharp edge, the block plane is the go-to for fast, accurate tweaks.
Beginner-Friendly: Easy to set up and forgiving to use, it’s a perfect introduction to hand planning for novices.
Portable and Practical: Toss it in your tool bag, and you’ve got a reliable ally wherever you go.
🛠️ A Collector’s Quiet Delight
Though not always the centerpiece of a collection, block planes come in a variety of styles and vintages that reflect the evolution of toolmaking. From early Stanley models to modern Veritas designs, each tells a story of craftsmanship and innovation. Their affordability and abundance make them an accessible entry point for new collectors, while rare variants still offer intrigue for seasoned enthusiasts.
✨ In Praise of the Everyday
In a world that often celebrates the rare and elaborate, the block plane reminds us of the beauty in utility. It’s a tool that earns its keep not through ornamentation, but through performance. And for those who restore tools, it’s often the first to be sharpened, tuned, and put back to work.
Has anyone else noticed the rising cost of replacement parts for Stanley and Record router planes? I recently went online to source components for my Stanley England No. 71 and was genuinely astonished by the asking prices.
If you were to build a router plane from scratch using spare parts purchased on eBay, you’d be lucky to come away with much change from £170. In contrast, a complete plane—equipped with three blades but without the original box, can sometimes be found for around £95. The economics of restoration are becoming increasingly skewed.
Fortunately, I’ve managed to build a modest collection of routers over the years, including:
The volume of spare plane components accumulated “just in case” is remarkable. I recently received a batch of such contingency parts from my brother. When combined with my existing inventory, the total is sufficient to assemble approximately 50 planes.
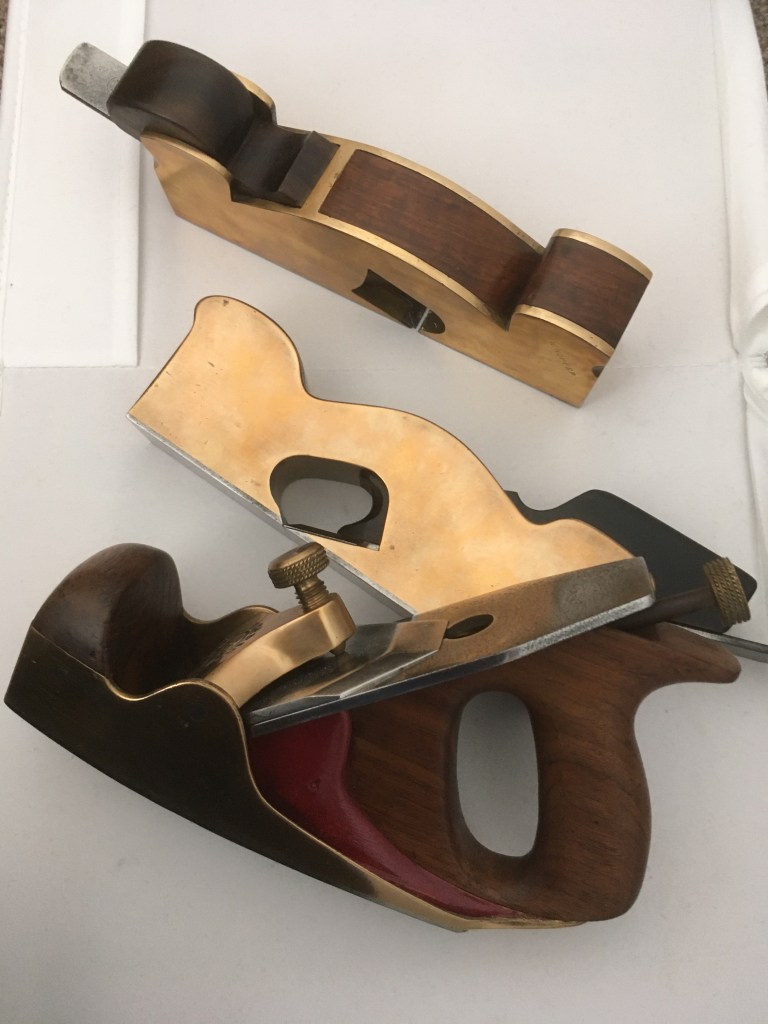
I’ve always been fascinated by the craftsmanship behind classic British hand planes, especially those made by Norris of London. Their tools are revered not just for their performance, but for the elegance and precision of their construction. Yet one detail has always puzzled me: how did Norris attach the steel soles to their brass-bodied planes?
With Spiers of Ayr, the answer is plain to see. Their planes feature visible dovetailing—mechanical joints that lock the steel sole to the sides of the body. It’s a beautiful and honest technique, one that speaks to the maker’s skill. But Norris? Their brass planes often show no such dovetails. The joint between sole and body is seamless, almost mysterious.
When I tried to uncover the exact process, I was told that the soles were “sweated on.” At first, I took this to mean some kind of soldering was involved. But what does “sweating on” really entail?
🔧 What Is Sweating?
In metalworking, sweating refers to a soldering or brazing method where two metals are joined by heating them until a filler metal melts and flows between the surfaces. Once cooled, the bond is strong and clean—perfect for a tool where aesthetics and durability matter.
In the case of Norris planes, this technique would involve heating the brass body and steel sole together with solder in between, allowing the molten metal to wick into the joint. The result? A flawless surface with no visible fasteners, perfectly aligned and polished.
🕵️♂️ Clues and Speculation
Some collectors and restorers have examined Norris planes closely and found no signs of dovetailing or mechanical pins. This supports the sweating theory. Others speculate that Norris may have used hidden pins or rivets, ground flush and invisible to the eye. Without destructive testing, it’s hard to say for certain.
There are also subtle clues—discoloration along the joint, faint seams, or slight variations in finish—that suggest soldering was indeed used. It’s a technique that would have allowed Norris to maintain their high standards of fit and finish while streamlining production.
🪚 Why Not Dovetail?
Dovetailing, while beautiful, is labour-intensive. Sweating the sole on would have been faster and more efficient, especially for brass-bodied planes where the aesthetic demanded a smooth, uninterrupted surface. It’s likely that Norris used dovetailing on some early models, but transitioned to sweating for later production.
📣 Calling All Experts
The truth may lie buried in workshop lore or hidden in the archives of Norris’s production history. If anyone out there has firsthand knowledge—perhaps from restoration work, old catalogues, or surviving correspondence—I’d love to hear from you. This mystery is part of what makes vintage tools so compelling: they’re not just objects, but stories waiting to be uncovered.
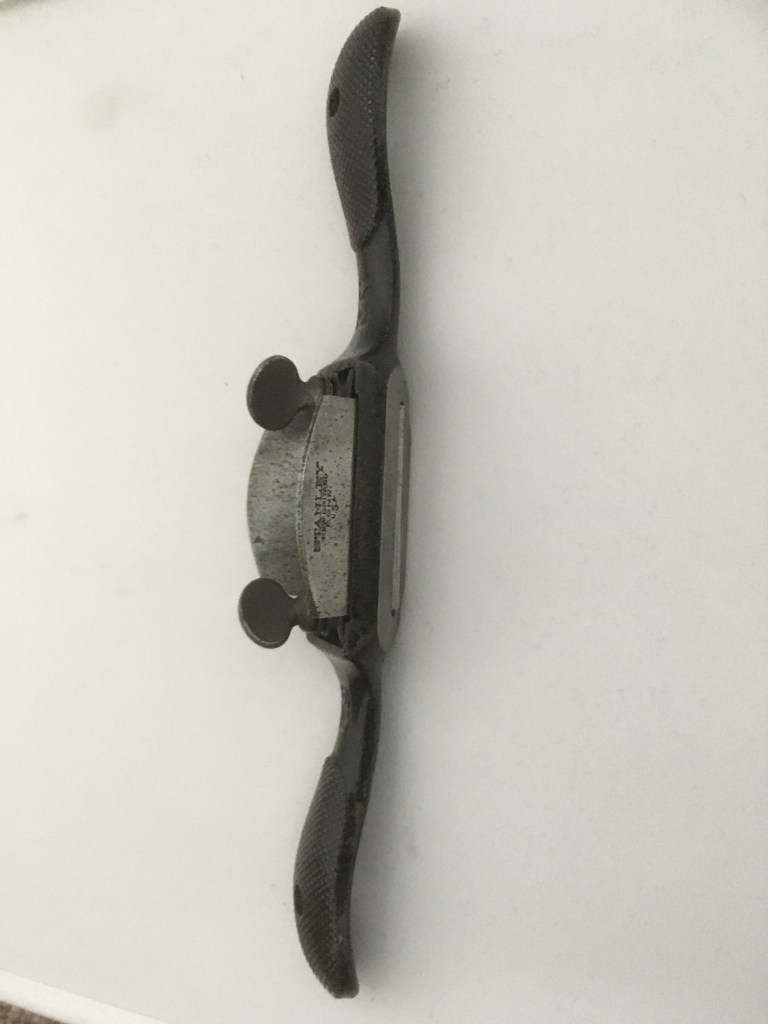
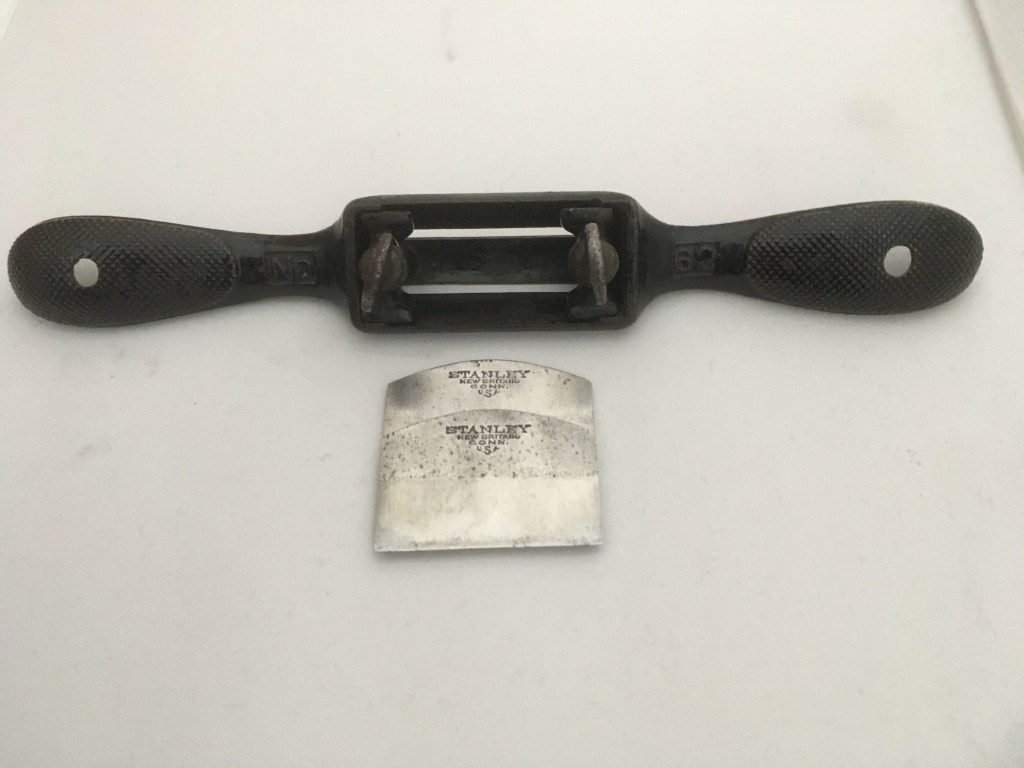
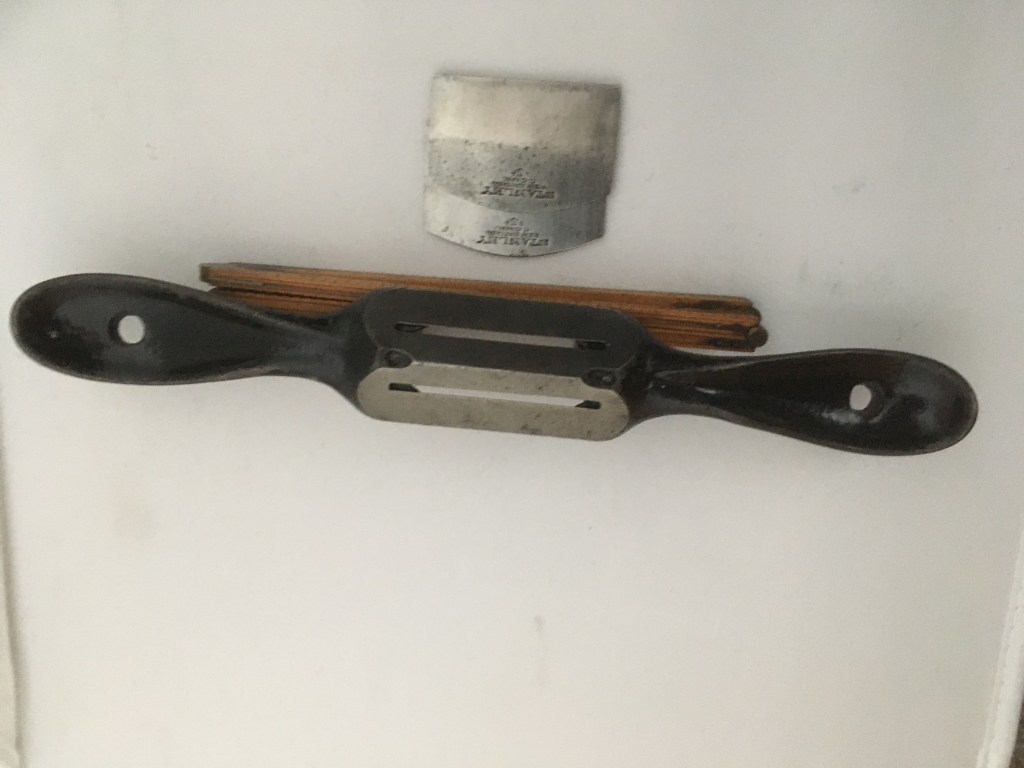
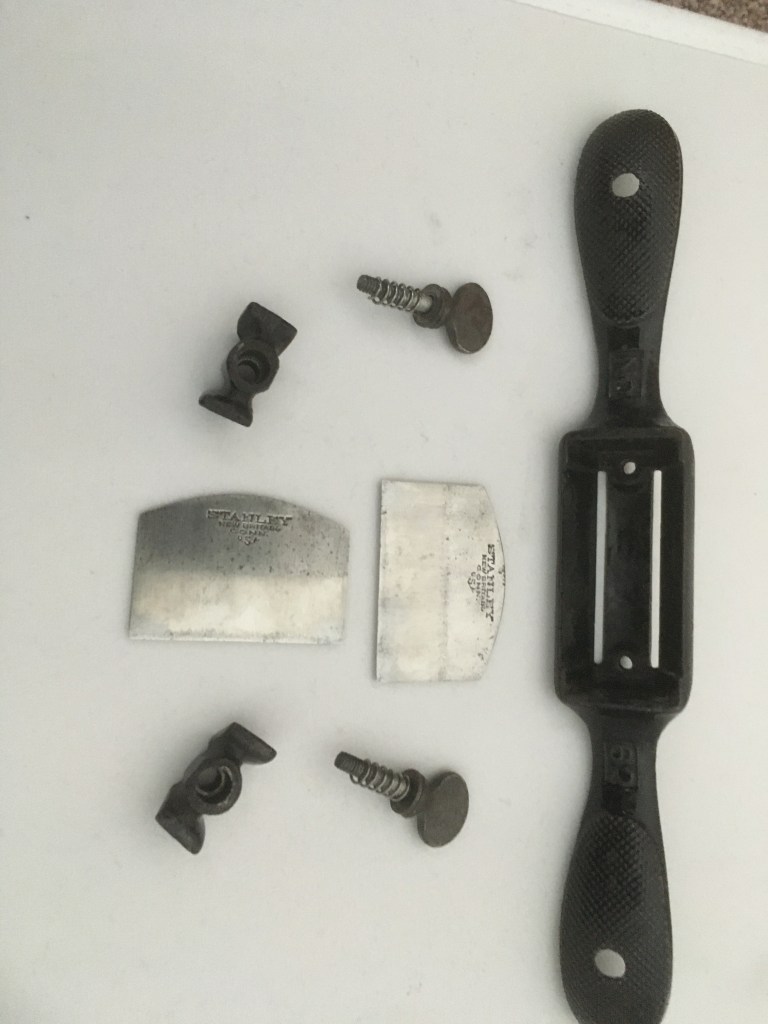
For an item that’s over 100 years old, this Stanley No. 62 spokeshave is in fantastic condition. It’s a rare tool, and I feel lucky to have one in my collection—especially in such well-preserved shape.
The design is clever and practical. It features a double-ended body, allowing for two blades—one on each end—so you can switch between them depending on the task. Each blade is held securely in place by spring-loaded locking nuts, which grip the metal tabs (lugs) that support the blades. This mechanism keeps everything tight and stable during use, making it a joy to work with. Owning a tool like this isn’t just about functionality—it’s about preserving a piece of craftsmanship from a bygone era.
Picked up a lovely little Stanley 101 block plane in great condition. At first glance, I thought it would go straight into my ever-growing Stanley collection. But after checking Blood & Gore, I realised the sides should be japanned. Another school day—always something new to learn in the world of vintage tools.